

So heres the thing that happened last Tuesday. My landlord stopped by for a routine inspection of my Berlin apartment, and I literally watched his face go through this whole journey when he saw my Renaissance skateboard collection on the walls. First confusion (are those... paintings?), then concern (did you drill into my walls?), and finally relief when I showed him the damage-free mounting system.
"You mean theres actually no holes?" he asked, running his fingers along the wall around my Caravaggio Medusa skateboard deck. "None," I confirmed. And you know what? That moment right there is exactly why I became obsessed with no-drill display methods. Because honestly... we shouldnt have to choose between security deposits and showcasing art we love.
Let me walk you through everything Ive learned about displaying skateboard decks without making a single hole in your walls. Trust me, after four years of Berlin apartment living and running DeckArts, Ive tested pretty much every method imaginable.
Why No-Drill Methods Actually Matter (Beyond Just Security Deposits)
Okay, so obviously the big reason people look for damage-free solutions is rental deposits. But actually, theres way more to it than that. According to Apartment Therapy's research on Command strips, damage-free hanging has become crucial for modern apartment living - not just for renters, but for anyone who wants flexibility in their space.
Here's what I mean: When you commit to drilling holes, you're also committing to that exact layout forever (or at least until you're ready to patch and repaint). But with adhesive methods? You can rearrange your skateboard art collection every month if you want. Change the height, swap positions, experiment with different configurations.
Plus - and this is something I learned from organizing Red Bull art events in Ukraine - the ability to quickly install and remove pieces is incredibly valuable. Pop-up exhibitions, temporary displays, seasonal rotations... all become possible when you're not locked into permanent wall modifications.
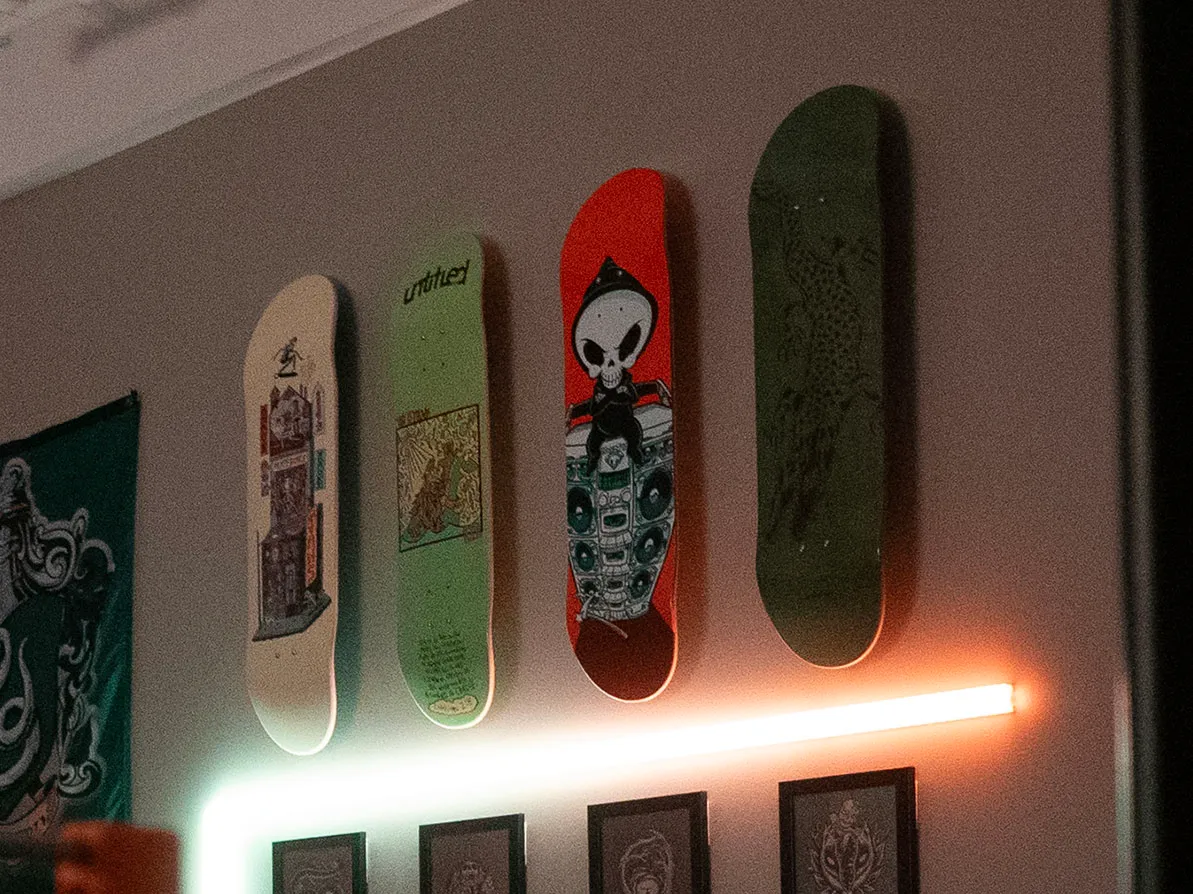
The Command Strip Revolution (And Why It Works for Skateboards)
 Close-up of adhesive strip system supporting Renaissance skateboard art without wall damage
Lets start with the most popular solution because honestly, its probably what you should try first. Command strips have basically revolutionized rental decorating, and they work surprisingly well for skateboard decks.
Here's the reality check though: A standard skateboard deck weighs about 2-3 pounds. That sounds light, right? But when you factor in the weight distribution and the torque from hanging vertically, you need serious adhesive strength. I learned this the hard way when a deck crashed down at 3am. Not fun.
What actually works:
The heavy-duty Command Picture Hanging Strips (the ones rated for 16-20 pounds) are your friend. You'll need multiple pairs - I use four pairs per deck minimum. Position them strategically: two pairs near the nose, two near the tail. This distributes weight evenly and prevents that awful sagging-in-the-middle look.
The surface prep mistake everyone makes:
You know how the package says to clean the wall first? Actually do it. I use 70% isopropyl alcohol on a paper towel, let it dry completely, then apply the strips. The difference in adhesion is dramatic. My first attempts failed because I skipped this step. Now? Some of my Command strip installations have been up for over a year without issues.
Temperature matters:
This one surprised me. According to NYT Wirecutter's apartment storage research, adhesive performance decreases significantly in cold temperatures. My Berlin apartment gets chilly in winter, and I noticed some strips losing grip. The solution? Make sure your room is at least 50°F (10°C) when installing, and avoid spots near windows or exterior walls.
The best part about Command strips? When I moved apartments last year, I removed every single one cleanly. No paint damage, no residue, no explaining to do. Just... clean walls. That alone is worth the investment.
Adhesive Mounting Brackets (The Hidden Gem)
This method doesnt get enough attention, but its actually my current favorite for heavier or more valuable pieces. You can buy or 3D-print small mounting brackets specifically designed to work with heavy-duty adhesive strips or mounting putty.
I'm currently using a set of custom brackets for our Frida Kahlo skateboard deck, and the stability is incredible. The bracket creates a small ledge that the skateboard deck rests on, so the adhesive isnt fighting gravity the same way vertical hanging does.
How it works:
The bracket mounts to the wall using either Command strips or 3M VHB (Very High Bond) tape - which is like Command strips' industrial-strength cousin. Then the skateboard deck sits in the bracket's groove. Some designs even have a small lip that prevents the deck from sliding off accidentally.
Cost consideration:
Commercial versions run $15-30 per bracket. 3D-printed options are cheaper if you have access to a printer (or know someone who does). I actually designed a custom bracket for DeckArts pieces that accommodates the specific dimensions of our skateboard decks. The precision fit makes all the difference.
What I love about this method is the professional look. It doesnt scream "rental apartment hack" - it looks intentional and gallery-quality. Perfect for displaying museum-level reproductions like the ones we create at DeckArts.
The Leaning Method (Simplest Is Sometimes Best)
Okay, hear me out on this one. Sometimes the best way to display skateboard decks without drilling is... not hanging them at all. Lean them.
I know, I know. It sounds too simple. But actually, leaning displays have become super trendy in interior design over the past few years. Theres something casual yet intentional about it that works really well with skateboard art.
Where it works best:
Mantels, shelves, console tables, even the floor against a wall. I've got our Bosch Garden of Earthly Delights triptych leaning against my living room wall right now, and it honestly looks better than when I had it mounted. The angle lets you see more of the artwork's detail than a flat wall mount sometimes allows.
The stability trick:
Museum putty or poster tack at the contact points. Just tiny amounts where the deck touches the surface - enough to prevent sliding but not enough to cause damage or leave residue. I use Loctite Fun-Tak, and its been perfect. Removable, reusable, damage-free.
Styling considerations:
This works especially well when you're grouping multiple decks together. I've seen incredible installations in Berlin galleries where 3-5 skateboard decks are leaned in a staggered arrangement on a long shelf or ledge. Creates this dynamic, layered look thats impossible to achieve with traditional hanging.
From my branding and merchandise design background, I know that sometimes breaking traditional display rules creates the strongest visual impact. Leaning definitely falls into that category.
Floating Shelves with Adhesive Mounting
 Renaissance skateboard art showcased on damage-free floating shelf system with industrial aesthetic
This approach combines storage functionality with display aesthetics, and its perfect for smaller spaces where every inch counts. You mount a floating shelf using adhesive strips, then display your skateboard deck on or leaning against it.
The weight calculation:
Heres where you need to do some math. If your skateboard deck weighs 2.5 pounds and your shelf weighs 3 pounds, you need adhesive rated for at least 10 pounds (I always double the actual weight for safety margin). Command makes shelf products specifically rated for this kind of load.
Strategic placement:
I've installed adhesive floating shelves in three different apartments now, and the key is choosing spots where wall studs are located, even though you're not drilling into them. Why? Because the drywall behind studs is better supported, which helps the adhesive maintain its grip over time.
Bonus benefit:
You can style the shelf with other items alongside your skateboard. I've got art books, a small plant, and a vintage camera sharing space with one of my decks. Creates this curated vignette thats way more interesting than a bare wall mount.
The thing I appreciate most about this method is flexibility. Dont like the arrangement? Pop the deck off, restyle, done. No reinstallation needed. Perfect for people like me who get bored with static displays.
Tension Rod Systems (The Overlooked Option)
This ones a bit more creative, but stick with me. Tension rods - like the ones people use for shower curtains or closet dividers - can actually work brilliantly for skateboard display, and they require zero wall damage.
How I've used them:
In a narrow hallway, I installed a tension rod between two walls about 5 feet up. Then I used small S-hooks to hang skateboard decks from the rod. The decks hang parallel to the wall, creating this unexpected gallery effect.
Weight limits matter:
Standard tension rods max out around 10-15 pounds total, so you're limited to 3-4 skateboard decks maximum. But honestly, sometimes less is more. A carefully curated selection of classical art skateboards displayed this way looks more intentional than a crowded wall.
Installation tip:
Make sure the rod is truly level. I use a laser level (learned this from my Red Bull event days in Ukraine where precision really mattered). Even a slight angle makes the whole display look off.
What I love about tension systems is theyre completely reversible. Move apartments? Take the rod down, reinstall elsewhere, done. No patching, no painting, no explaining to landlords.
Magnetic Mounting (For Specific Wall Types)
Okay, this method wont work for everyone, but if you've got metal surfaces available - like an exposed steel beam, industrial loft features, or even certain types of painted metal doors - magnets can be incredibly effective.
The magnet strength you need:
Neodymium magnets rated for at least 25-30 pounds of pull force. Regular fridge magnets wont cut it. I use disk magnets about 1 inch in diameter, and I attach them to the back of the skateboard deck using industrial-strength adhesive or epoxy.
Where Ive seen this work:
A design studio in Berlin's Kreuzberg neighborhood has their entire skateboard collection displayed magnetically on a steel column. Its stunning - the decks appear to float against the metal surface. The contrast between classical artwork and industrial mounting creates this really compelling tension.
Important safety note:
Always test your magnet's hold before trusting it with valuable pieces. And consider using safety cables as backup - thin clear fishing line attached to stable points nearby, just in case. Better paranoid than sorry when you're dealing with museum-quality art reproductions.
The Combination Approach (What I Actually Use)
Here's my honest recommendation after years of experimentation: Dont commit to just one method. Use different techniques for different pieces and locations throughout your space.
In my current Berlin apartment, I've got:
- Two decks on Command strip mounts in the living room
- The Bosch triptych leaning against my living room wall
- A floating shelf system in the hallway holding three decks
- One Frida Kahlo deck in an adhesive bracket near my workspace
This variety creates visual interest and also spreads risk. If one mounting method fails, I havent lost my entire collection. Plus, the different display techniques actually help tell different stories about each piece.
From my graphic design background, I know that repetition with variation creates strong visual impact. Same principle applies here - unified by the art theme, but differentiated in presentation.
Common Mistakes (That Ive Definitely Made)
Let me save you some trouble by sharing my failures:
Mistake #1: Rushing the adhesive cure time
Command strips need 72 hours to reach full adhesive strength. I learned this when a deck fell after just 24 hours. Now I always wait the full three days before trusting any adhesive mount with weight. Use temporary supports during this period if needed.
Mistake #2: Ignoring humidity
Bathrooms and kitchens are terrible for adhesive mounting. The moisture weakens the bond over time. I had a deck in my bathroom that seemed fine for weeks, then suddenly failed on a particularly steamy morning after a long shower. Not worth the risk.
Mistake #3: Overloading single mounting points
Distribute weight across multiple adhesive points. One heavy-duty Command strip might be rated for 20 pounds, but it shouldnt be your only support for a 3-pound deck. Physics and engineering matter here - use redundancy.
Mistake #4: Forgetting about seasonal temperature changes
My first Berlin winter taught me this lesson. As temperatures dropped, some of my adhesive mounts started slipping. Now I check all my installations when seasons change and add reinforcement if needed.
Mistake #5: Using dollar-store adhesives
I tried cheap alternatives to Command strips once. Once. They failed within days, and one actually pulled paint off my wall when I removed it. Stick with quality products from 3M or similar reputable brands. Your security deposit is worth way more than the few euros you'd save.
Advanced Tip: The Hybrid Security System
Heres something I developed for really valuable pieces thats worked incredibly well. I call it my "hybrid security" approach, and it combines primary mounting with backup systems.
For my most valuable DeckArts pieces - like limited editions or personal favorites - I use this setup:
Primary mount: Heavy-duty adhesive system (Command strips or VHB tape on brackets)
Secondary backup: Thin clear fishing line attached to small adhesive hooks positioned above the deck. The line has enough slack that its invisible in normal display, but if the primary mount fails, the fishing line catches the deck before it falls.
Tertiary safety: Foam padding placed discretely below valuable pieces. If both primary and secondary systems fail, at least the fall is cushioned.
Is this paranoid? Maybe. But when you're dealing with €200+ skateboard art pieces... a little paranoia is justified. And honestly, it gives me peace of mind that lets me actually enjoy the display rather than worrying constantly.
The Renter Psychology Factor
You know whats interesting? I've noticed that no-drill display methods actually change how people interact with their spaces. When you're not committed to permanent installations, you experiment more. You try new arrangements. You rotate pieces seasonally.
I wrote about this design psychology in my horizontal vs vertical display article, but it applies here too. The flexibility that comes with damage-free mounting encourages creativity rather than stifling it.
In my four years living in Berlin rental apartments, I've rearranged my skateboard art collection probably twenty times. Each configuration tells a slightly different story, emphasizes different aspects of the artwork. That kind of dynamic curation wouldnt be possible if I'd drilled permanent mounts.
Real Talk About Limitations
Okay, lets be honest. Damage-free methods arent perfect. There are trade-offs:
Weight capacity is genuinely limited compared to screws and anchors. If you've got heavy vintage boards or loaded-up complete skateboards (with trucks and wheels), adhesive mounting might not cut it. For display-only decks like our DeckArts pieces? Perfect. For functional equipment? Consider other options.
Long-term reliability varies with environmental conditions. A climate-controlled apartment in consistent temperatures? Great. A space with major temperature swings or humidity fluctuations? Youll need more frequent maintenance and checks.
Professional appearance can sometimes be compromised. Lets be real - a well-installed wall anchor system is still the gold standard for clean, professional display. Adhesive methods are excellent, but theyre not always invisible.
The key is being realistic about these limitations and working within them. Choose the right method for each specific piece and location rather than forcing one solution everywhere.
Looking Forward: New Technologies
The damage-free mounting industry is actually evolving pretty rapidly. In the past year alone, I've seen:
Nano-suction materials that create incredible grip without traditional adhesives. They work by creating millions of tiny suction points. Still experimental for heavier items, but fascinating technology.
Gecko-inspired adhesives that mimic the foot structure of geckos. Some companies are developing products based on this biomimicry, and early results are promising for both strength and removability.
Smart mounting systems with built-in weight sensors and alerts. Sounds excessive? Maybe. But imagine getting a notification that one of your mounts is losing adhesion before it actually fails. That technology is already in prototype.
As someone who's built a business around skateboard art, I'm genuinely excited about where this technology is headed. Better, safer, more reliable damage-free solutions will make beautiful collections more accessible to renters everywhere.
The Art History Connection
Putting on my art curator hat for a moment (the one I wear when I'm not being a skateboard designer), theres something appropriate about temporary, reversible mounting for art pieces.
During the Renaissance, wealthy patrons frequently rearranged their collections. Paintings moved between residences, got loaned to other collectors, were displayed in different configurations for different seasons or occasions. The idea of static, permanent display is actually fairly modern.
So when you're using Command strips to mount your skateboard art, you're actually participating in a centuries-old tradition of flexible, dynamic art curation. Just with, you know, better adhesive technology than they had in 15th century Florence.
Lorenzo de' Medici would probably be pretty into Command strips, is what I'm saying.
Making Your Decision: A Framework
After all this, how do you actually choose which method to use? Here's the framework I recommend:
Step 1: Assess your walls - Smooth painted drywall? Great, lots of options. Textured surfaces? Your choices narrow. Brick or concrete? You're mostly limited to leaning or tension systems.
Step 2: Consider your timeline - Staying in this apartment for 5+ years? You might consider asking permission for proper mounting hardware. Moving in 6 months? Definitely go damage-free.
Step 3: Evaluate your collection value - Inexpensive mass-produced decks? Simple Command strips are fine. Museum-quality art pieces? Consider hybrid security systems with backup protection.
Step 4: Factor in your rearrangement frequency - Love to redecorate often? Leaning or floating shelf methods give maximum flexibility. Prefer static displays? Adhesive brackets offer more permanent-feeling installations.
Step 5: Account for your DIY confidence - Comfortable with measuring and precision? Try tension systems or custom bracket solutions. Prefer simplicity? Stick with Command strips or leaning displays.
There's no universal "best" method. The best method is the one that matches your specific situation, skills, and needs.
Final Thoughts from Four Years of Berlin Rentals
You know what I've learned from displaying skateboard art across multiple rental apartments? The "perfect" display doesnt exist. But the right display for right now? Thats absolutely achievable.
My first apartment, I was terrified of damage and used the most minimal mounting possible. Everything looked tentative, temporary, un-curated. Now? I use damage-free methods with confidence, and my collections look gallery-quality.
The difference wasnt the technology - Command strips existed back then too. The difference was trusting the process, understanding the limitations, and working creatively within those boundaries.
Whether you're displaying pieces from our collection or vintage boards from your own skating history, you deserve to see that art on your walls. Dont let rental restrictions keep beautiful pieces in closets. Use these methods, experiment confidently, and create the gallery space you want.
And if something does fall? (It probably wont, but if it does...) Well, thats just part of the learning process. I've been there. We've all been there. You'll figure out what went wrong, adjust, and mount it better the next time.
Thats the beauty of damage-free methods - you always get another chance.
I actually covered more technical mounting details in my 7 methods for hanging skateboards article if you want to dive deeper into the specifics.
About the Author
Stanislav Arnautov is the founder of DeckArts and a creative director originally from Ukraine, now based in Berlin. With extensive experience in branding, merchandise design, and vector graphics, Stanislav has worked with Ukrainian streetwear brands and organized art events for Red Bull Ukraine. His unique expertise combines classical art knowledge with modern design sensibilities, creating museum-quality skateboard art that bridges Renaissance masterpieces with contemporary culture. Follow him on Instagram, visit his personal website stasarnautov.com, or check out DeckArts on Instagram and explore the curated collection at DeckArts.com.