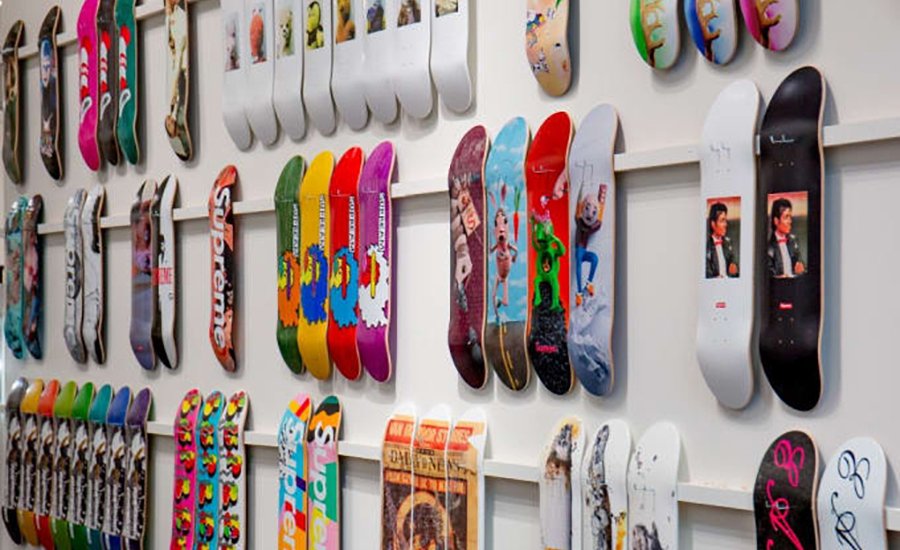
I remember the anxiety. You’ve just acquired a stunning, collectible piece of skateboard art collection, signed and numbered, and the final step—drilling the wall—feels like the most terrifying part of the entire process. It’s the moment of commitment, where the art leaves the safety of its box and becomes a permanent fixture of your architecture. Many collectors delay this step out of fear of getting the spacing wrong, damaging the deck, or simply making a mistake, but that fear is unwarranted. A successful installation is simply a matter of following precise, proven rules.
At DeckArts, we believe the mounting process should be as clean and elegant as the art itself. Your skateboard wall art should float off the wall like a sculpture, not hang awkwardly like a standard framed print. Here is my comprehensive guide to transforming your collectible deck from a flat object into a dynamic, three-dimensional wall exhibit.

Stage 1: Choosing the Hardware—The Secret to the "Floating" Effect
The key to gallery-level installation is using invisible hardware. Standard wall hooks or wire systems are unacceptable, as they distract from the authentic skateboard graphics and fail to provide the secure, dimensional hold needed.
Why Specialized Mounts Matter
Our specialized mounts are designed to minimize contact with the deck's surface and provide a crucial standoff from the wall.
-
The Three-Dimensional Effect (Floating): The hardware must allow the deck to float 1-2 cm off the wall. This gap creates a subtle shadow around the perimeter, which visually separates the art from the background and dramatically emphasizes its concave (curved shape). This elevates the deck into a sculptural element.
-
Security and Stability: The mounting system must be securely fixed in at least two points (usually through the truck holes) to prevent the deck from rotating or tilting, ensuring perfect horizontal or vertical orientation. You can purchase our recommended, discreet mounting hardware along with any deck, such as our Geometric Flow Deck.
Stage 2: The Art of Placement—Spacing and Orientation Rules
If you are hanging a single deck, placement is intuitive. But when creating a triptych, a quad-set, or a mixed-media gallery wall, the interval between the pieces becomes paramount.
The "Finger Rule" for Multi-Deck Sets
When installing multi-deck compositions, such as our triptych Limited Edition Collection, the negative space between the decks should be less than the width of a single deck.
-
The Ideal Interval: I recommend leaving 2.5–5 cm (1–2 inches) between the edges of the decks. If the space is too wide, each deck is perceived as a separate object; keeping the space tight ensures the composition is viewed as a single, cohesive piece of art, which enhances the overall narrative flow.
-
The Center Line: Always begin by finding the central point on your wall, and then work outward. The center of your middle piece (if it's a triptych) should generally be at eye level (about 150-160 cm or 58-64 inches from the floor), or lower if placed above a sofa or console table.
Horizontal vs. Vertical Mounting
Most collectors default to vertical mounting, as it best shows off the deck's unique shape. However, horizontal placement can be incredibly effective for certain design goals.
-
Horizontal: Best suited for rooms with lower ceilings or for creating a visual line above long furniture. Horizontal orientation emphasizes the dynamism and movement inherent in the design.
-
Vertical: Ideal for creating a dramatic accent in narrow spaces or adding perceived height to a room. This format works exceptionally well with large, narrative works, like the Urban Narrative Deck. You can study how orientation impacts space in our guide, Color Theory 101: Matching Art to Your Space.
 Stage 3: Technical Execution—Precision is Key
Installation success depends entirely on precision. Do not rely on guesswork.
-
The Template: Create a life-size paper template (or use painter’s tape) for each deck. Place these templates on the wall, using a level and tape measure until you find the perfect layout. Mark the precise points for drilling directly through the template.
-
Tools and Durability: Always use a spirit level. For walls made of concrete or brick, use the appropriate anchors and plugs. Remember: you are securing a collectible item, and the hardware must be as durable as the art itself. The durability of the art itself is guaranteed by the high-quality materials we discussed in The Manufacturing Process: From Wood to Wall.
-
Protection: If you are installing your skateboard art collection in a high-light area, ensure you have taken UV-protection measures. The proper care and installation of your art is the final step in preserving its value.
Once installation is complete, your deck is no longer just a piece of wood—it is a three-dimensional sculpture that instantly transforms the space. Correct mounting is the final, crucial step in realizing the artist's vision. Start planning your next installation by choosing the perfect deck in our catalog today.
About the Author
The journey of art, for me, culminates not in the making, but in the hanging. I’m Stanislav Arnautov, and my role at DeckArts is to bridge the gap between street culture and interior architecture. I believe the power of authentic skateboard graphics is fully unlocked only when it is displayed with the respect and precision usually reserved for museum pieces. My personal obsession—whether designing a new mount or curating a wall—is with that moment of transformation: when a flat object gains dimension and life.
Follow my insights on art display and collection curation: Instagram @rntv and stasarnautov.com.

